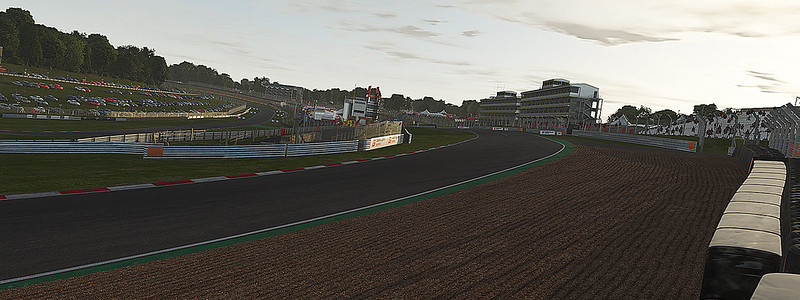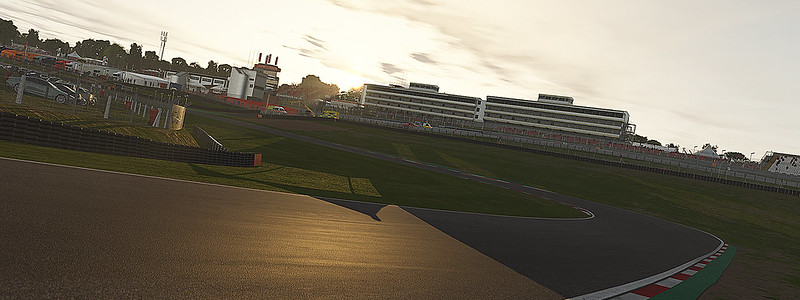
Alongside the popular British Donington Park Grand Prix Circuit Studio 397 will also release the Brands Hatch circuit as part of the May Q2 content drop.
Studio 397 Quote:
Another day, another quality content announcement for rFactor 2!
Keeping with the somewhat British theme established by our announcement of Donington Park back on Tuesday, this time we head to another leafy suburb of the UK for a racetrack steeped in history and prestige, a place where many of the most iconic moments in motorsport have been made and captured, a place where one either loves it without question or simply just cannot get their head around how to drive it quickly… that’s right, we’ve been busy scanning and building the wonderful, the sensational, the tricky and the very, very cool Brands Hatch Circuit!
Built to laser scan data we have captured ourselves, and with no effort spared to make this the most immersive, realistic, and accurate representation of the track possible, we are delighted to today announce this beautiful track is coming in the 2022 Q2 May content drop for rFactor 2!
Set to feature both the short Indy layout and the full Grand Prix configuration, Brands Hatch has been a staple venue on the national and international motorsports schedule since it first opened its doors to the public all the way back in 1950. Host to Formula One racing on no less than 12 occasions, the last of which was won to great fanfare by home hero Nigel Mansell in 1986, Brands Hatch continues to be regarded as one of the finest driver circuits in Europe to this day, and a track that will surely excite our playing community here in rFactor 2.
Often a very difficult circuit to master, let’s take a closer look at the 2.433 mile (3.916 km) circuit in more detail ahead of release next month.
The Track
Paddock Hill Bend
So, you think you know hills, do you? Well, prepare for something completely different with the run down into Paddock Hill Bend, the opening corner of the Brands Hatch Grand Prix Circuit. Approached at speed and with a deceleration zone very close to where the drivers pass the start/finish line here at Brands Hatch, the entry into Paddock Hill is a difficult one. Here, the circuit starts to roll away from you on corner entry, forcing the drivers to both brakes and steer at the same time in order to set up the entry into the turn, before easing off the brake and positioning the car as it quickly rolls down the hill and into the compression at the bottom of the turn.
What goes down must go back up again, and this is very much the case here as the cars begin their approach into the Druids Hairpin, climbing sharply back up the hill again using the speed carried through the Paddock Hill section.
Druids
A right-hand hairpin corner approached uphill following the descent through Paddock T1, here is a great place to look for an overtake on your rival competitor. Overtakes at Druids often begin by setting up the car ahead before, during, and after Paddock Hill, with a premium on achieving maximum corner exit of the previous turn, in order to sneak a nose inside into the uphill braking zone ahead of Druids.
As you are hauling the car up a steep incline during braking, despite the track beginning to level out into Druids itself, you can really attack the middle pedal here and carry the speed into the apex late on the brakes. Use the brake to help rotate the car through the corner, and don’t be tempted to mount the inside curb, as this will firmly unsettle the car and lose you valuable speed through the corner and the following section into Graham Hill Bend. Get it wrong and drivers always have a safety net of the extended run-off on the corner exit, but beware, the grip isn’t at a premium here, so use with caution.
Graham Hill Bend
One of the best corners here at Brands Hatch, and again another turn preceded by a steep decline after the exit of Druids, Graham Hill Bend can be taken very quickly indeed if you have the confidence and grip underneath you in the car. With plenty of grass on the outside of the corner, and a bit of extra room to run wide, it is often desirable here to push that little harder in order to really find the maximum potential of the car and grip available. As the track meanders slightly to the left-hand side into the braking zone, drivers will have to apply the brakes in a gradual way in order to keep the car stable and under control, gradually increasing the pressure and utilizing trail braking through the corner in order to help keep everything under control, and improve the rotation potential mid-turn for a swift resumption of the loud pedal.
Surtees
Frustrating. Critical. Frustrating… oh, did I mention frustrating? Surtees is one of those corners that more often than not you will get slightly wrong, and wave goodbye to free lap time all the way down the following straight and into the spectacular Pilgrims Drop. The Surtees corner demands respect and laser focussed concentration in order to really hit your marks and hustle the car through the apex at just the right point of speed vs understeer.
Approach the turn at the very most right-hand side of the track to take advantage of the most circuit width possible, and be sure not to get caught out by a desire to carry too much speed into corner entry, should it compromise your ability to pull the car into the corner and launch successfully onto the following straight.
Hawthorne Bend
Now on the old Grand Prix Circuit configuration, here we are firmly into the wooded part of Brands Hatch. While this makes for spectacular scenery, the overhanging trees and the lesser-used nature of this configuration means drivers can expect to be presented with less grip and a more greasy track surface than has been encountered up to this point. Not an ideal situation when approaching a corner like Hawthorn, reached at close to top speed thanks to the previous straight and run through the spectacular Pilgrims Drop.
Pitch the car into the corner with confidence, scrubbing speed as you go, and try to keep the left-hand side wheels as close to the inside curb as possible, but be careful not to hook a tyre on the curb, as that could easily spit you off the racing line from where the speeds are so high it could prove very challenging to recover.
Westfield Bend
The circuit is at one of its widest points at this stage, with generous (for Brands Hatch anyway) gravel lining the outside of the corner should you get it wrong. Although very separate corners, here Westfield, Dingle Dell, and Sheene’s are very firmly interlinked in terms of the flow of the car. Carry the speed through Westfield with plenty of inside curb, and that will set you up nicely for preparing the car into the Dingle Dell / Sheene’s complex that is fast approaching.
On the corner exit, the circuit offers generous artificial run-off opportunities where drivers can drop the outside wheel for additional space to accelerate before the car compresses into the dip and speed carries you forward at what feels like an alarming rate for the approach into Dingle Dell.
Dingle Dell
Dingle Dell might be a fairly straightforward piece of tarmac on paper but linked as it is between Westfield behind and Sheene’s up ahead, it makes for an interesting opportunity to try and keep the car within the circuit confines, gather any moments from Westfield, balance the weight transfer and get the braking setup and ready in anticipation for the run down into Sheene’s… a pretty complex situation at the very best of times.
Sheene’s
Much like back at Westfield, here the inside curb is your friend, but that friendship is a fickle one, so tread lightly or risk having things go sideways very, very quickly indeed. Another of those Brands Hatch Grand Prix Circuit corners that are attacked at speeds that feel far too fast for comfort, Sheene’s requires the driver to flick down one, maybe two gears and really commit hard into the inside curb. Put on the lock, throw the car into the turn and let the natural momentum carry you over the curb and to the outside of the corner exit, but be careful, right after this terrifying experience we need to somehow pull the car back to the right-hand side, and get ready for the sharp left of Stirlings and the following straight.
Stirlings
Another corner that looks quite slow but in reality has a much higher minimum speed than expected, Stirlings requires quick reflexes to get the car hunkered down in the very short deceleration zone, a quick flick of the ‘box to drop a gear, point it to the apex and get hard on the power for the run down Clearways and into the final corner.
Clark Curve
The final corner! Clark is a critical corner to get right, as a quick exit here will not only provide a solid close to your current lap but will also carry speed for the remainder of the straight into the following tour of the circuit. Approached very quickly indeed following a long blast under the bridge on the penultimate straight of the Grand Prix Circuit, be sure to counter for potential understeer here on the corner exit, as Clark Curve is deceptively long in radius, and with the way the tarmac is cambered it is very easy to allow the car to drift too far right under power, and into the ever waiting gravel trap and retirement.
Official Webpage – www.studio-397.com – The rFactor 2 Racing Simulator is available via Steam for €29,99.
 Bsimracing Sim Racing Resources and News for the racing enthousiast.

