Trak Racer RS6 Review By AussieStig
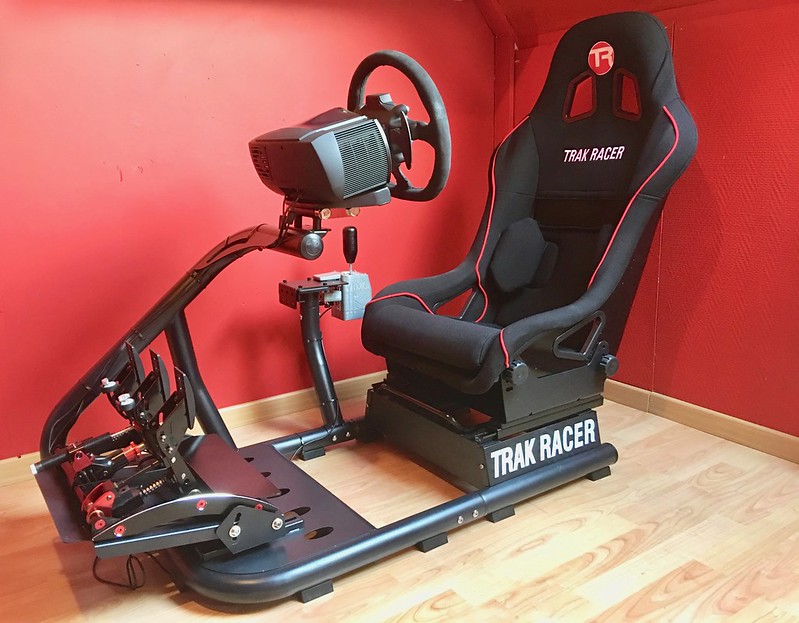
Australian, Melbourne based simulator company Trak Racer produce several different static sim racing simulators and accessories for the international market. Today we look at their designated RS6 model, one of their newest entry-level offerings.
Packaging
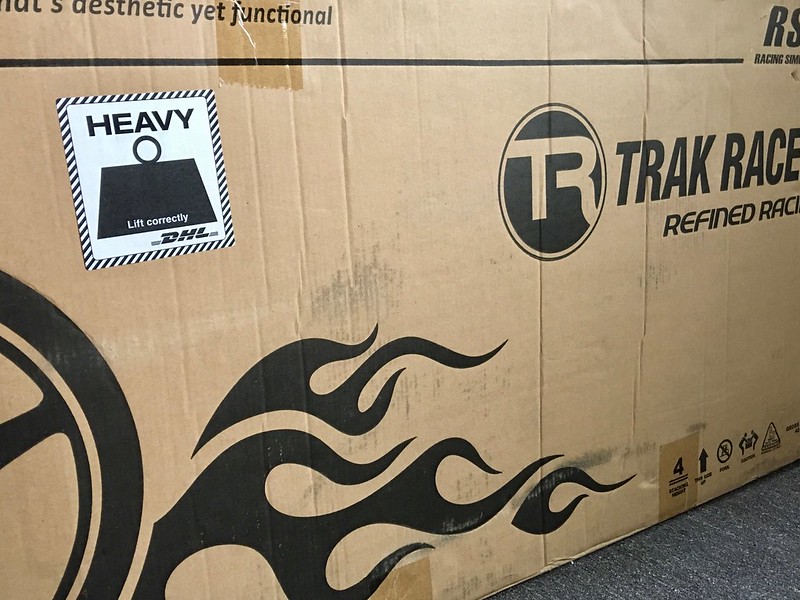
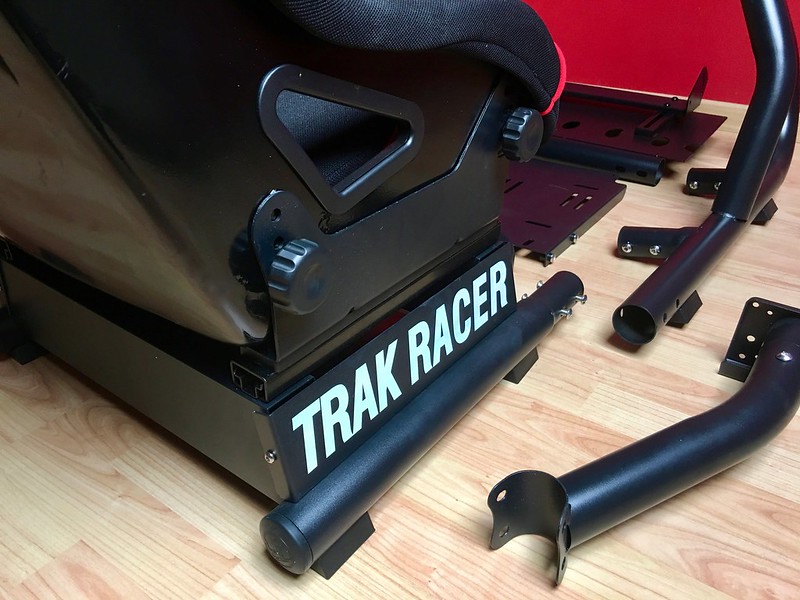
Like most off the shelf simulators, the RS6 arrived in one very large box, which also contained the non-reclining, one-piece racing seat. Contents wise, the Trak Racer RS6 is shipped in several sections, stacked atop one another and divided by thick polystyrene pieces, which protect the satin black metal finish during shipping. For extra protection, the fabric-clad racing seat is wrapped in a
thickish bubble wrap.
Contents
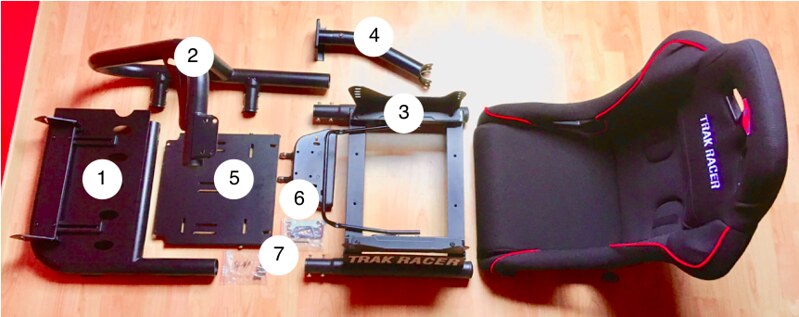
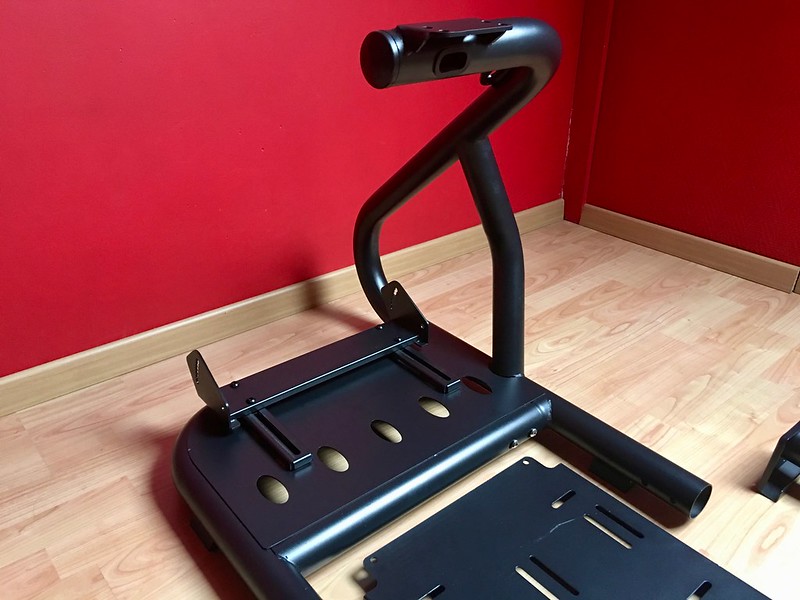
Seen from above, these are the entire contents of the large shipping box. Clearly visible are the three main sections numbered 1, 2 and 3, which go to make up the RS6 simulator. To aid in the assembly process, the necessary hardware and instructions are included in the packaging.
Box Contents:
Finish
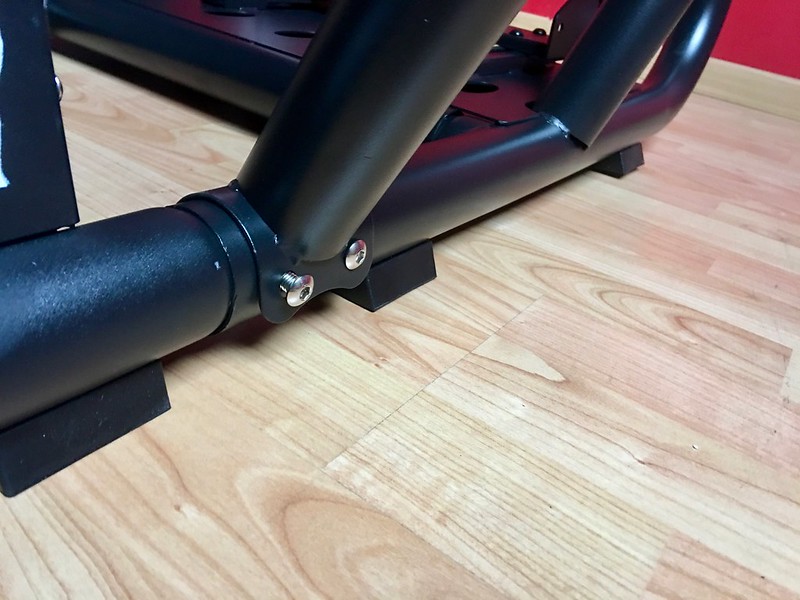
On inspection of the separate frame sections, some small imperfections could be found in the metal’s satin black finish. These consisted of some minor scuffs and did not effect the overall look of the RS6 once assembled. Welds were generally clean and well executed. The seat fabric was a little creased in areas, the padded sections were relatively well upholstered and the level of quality in the embossed branding was quite crisp. Scuffs not withstanding, overall the RS6’s level of finish is acceptable for this entry level cockpit simulator.
Instructions
RS6 Assembly
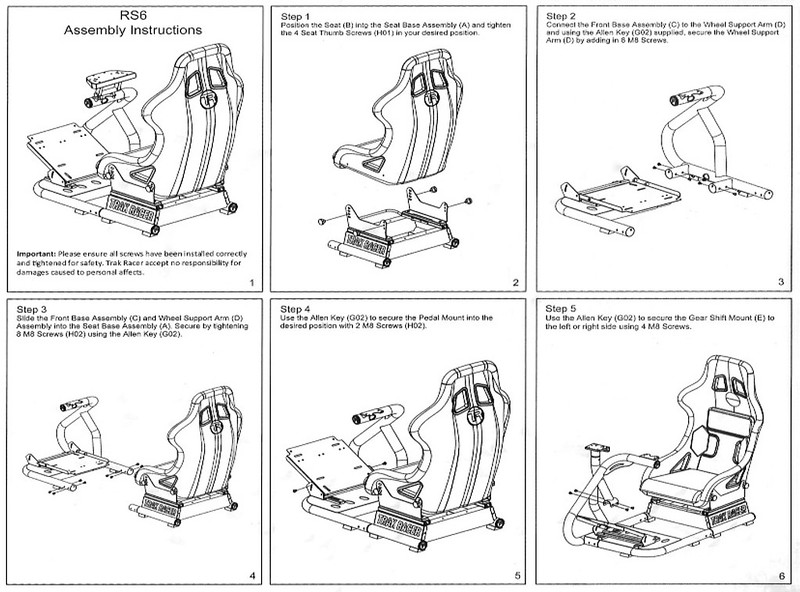
The supplied assembly instructions are clear and concise. A total of six steps are required to assemble the RS6 and it should take around one hour to complete them.
We start by adding the seat to the sliding seat support and rear chassis section using the four large tightening knobs which, were already partly screwed into the seat sides. Obviously, these knobs need to be unscrewed prior to positioning the seat in its brackets. Because the seat is of the nonreclining type, I wanted it to sit as low as possible and be slightly reclined, so I decided on the lowest holes at the rear and the third hole from the bottom at the front of the seat bracket.
Following the seat is the fitting of the front frame/pedal deck support to the steering support / front chassis section. A total of eight bolts are required to effect a solid connection of these two sections.
Step three requires what are now essentially the two halves of the simulator being brought together. According to the instructions, step five involves attaching the shifter mount to the side of your choice. If you are utilizing the shifter mount, you can save time and unnecessary bolting and unbolting of the frame sections by adding it during step three.
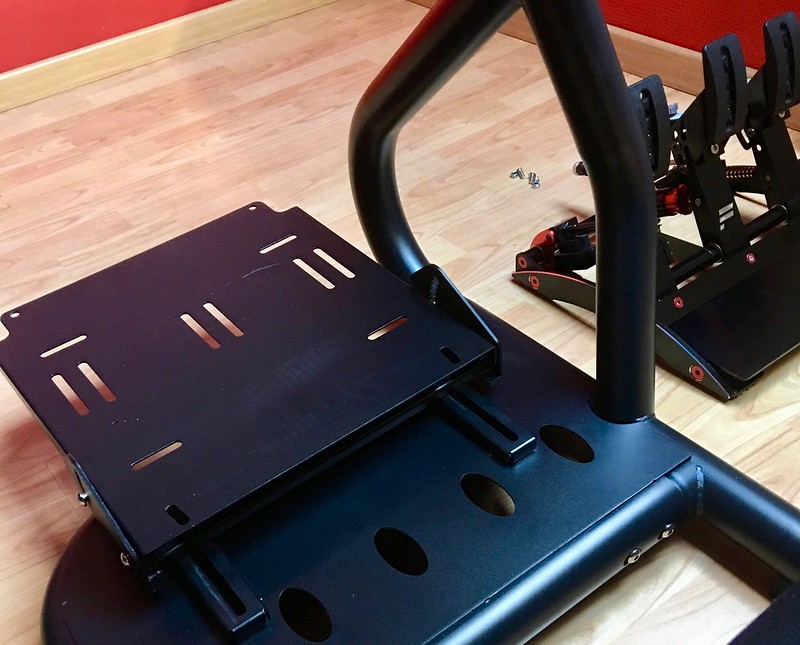
Step four, attaching the pedal deck to the pedal support brackets on the front section of the frame. At this stage I would suggest test mounting your pedals as close as possible to your ideal or preferred driving position. Reason being, the bolts on the sliding or adjustable fore and aft part of the pedal support are harder to access once the pedal deck is in place.
As previously mentioned, step 5 can be skipped as this involves bolting the shifter mount to the frame side of your choice.
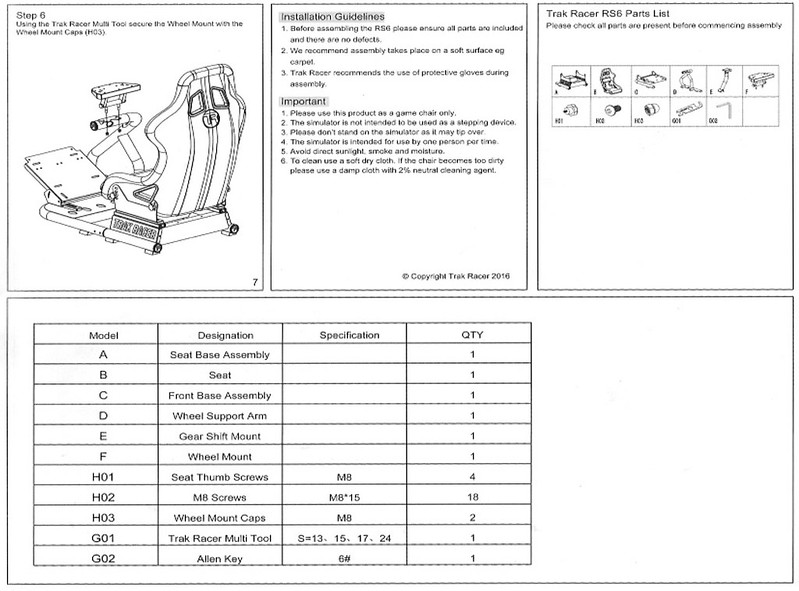
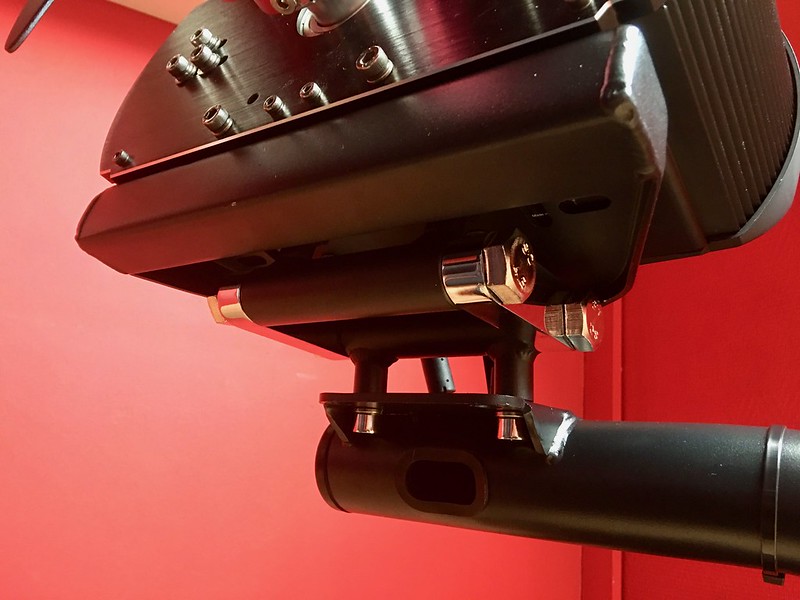
Step six is the final step and has us attaching the wheel deck to the steering arm support of the main frame This consists of two large bolts, which are screwed from the underside of the steering support arm’s plate. Once these are securely tightened, we can now determine the angle, height and to a certain extent, reach of your chosen wheelbase.
There is a wrench tool supplied for the four rather large locking bolts on either side of the pivoting wheel deck bracket. However, in order to tighten them sufficiently, I used my own open ended wrench and ‘’Sidchrome’’ socket set. It is important these bolts are securely tightened as they need to stand up to the weight of your wheelbase and the rigours of some heated sim racing.
All that is left to do now is fine tune your driving position and wire up the controls. For hidden cable management, there are two pre-cut rubber lined openings in the frame’s tubing to facilitate the wiring/cables being mostly concealed from view. Initially, I attempted to thread the Fanatec’s cables through the upper opening, hoping to find the opening situated under the right side of the
front frame section. I used an electrician’s wire puller (nylon cable) to aid me in locating the opening so I could then secure them to it and draw them back through the frame.
Because the tubes are hollow, running the puller through the frame was not a straightforward thing. It took the long way around the curved front section in place of a more direct route via the vertical brace to the lower opening.
An alternative is to use a length of stout cord or fishing line with a sinker or nut tied to the end of it and use gravity to locate the lower opening.
Threading the cable through the frame could be made easier if the longer curved tube were blocked off at the point where the more vertical brace tube meets it. This vertical tube attaches to the front frame almost exactly where the lower opening is located.
In the end,though, I decided to use the tried and true method of tie-rips and securing the cables to the frame that way.
Driving Position & Comfort
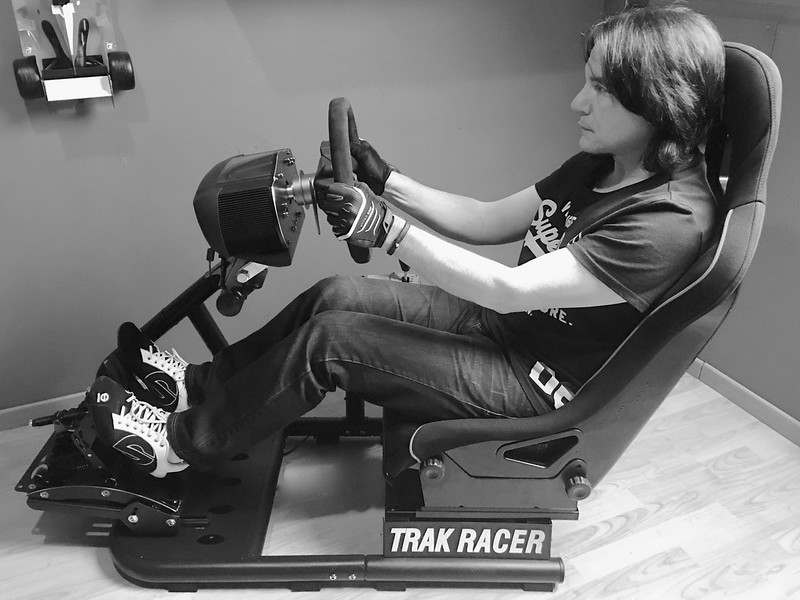
Wherever possible, with most of the simulators I review, I like to mount the seat as low as I can. This, in turn, allows my legs to be straighter and the wheel up a little higher with the top of the rim somewhere between neck and shoulder height when seated.
With a little tweaking of the RS6, I managed to achieve a good GT seating position. The two kidney area seat bolsters supplied with the seat were removed from their velcro stripped positions, this gave me the most comfortable feeling whilst seated.
The non-adjustable rubber blocked feet on the underside of the frame offer good grip on hard surfaces and isolate some of the vibrations going through the simulator’s frame.
Getting in and out of the simulator is made easy by the A-symmetrical frame design, which allows for good access and egress. If the shifter were to be mounted on the left side of the simulator, access would be slightly more impeded due to the vertical bracing tube on the right side of the frame.
Sim racing with the RS6
After plugging in the Fanatec controls, it was time to fire up the PC, don the trusty Oculus DK2 and head out on the circuit. My first impressions of the simulator; it is quite comfortable to sit in with the seat offering a good level of support. Although the seat is of the non-reclining type, I did not experience any back pain or fatigue while driving. The seat’s base is well padded, although it is a little on the snug side.
The reasonably accurate GT position feels quite immersive while GT or open wheel racing. The driving position in VR is less critical as your mind is fooled into thinking you are in any number of cars and seating positions. Nevertheless, the RS6 provides a decent platform on which to race, including old school heel and toeing, which is my favorite.
As for the stability of the controls, I have the CSP v3 brake pedal set up to be quite hard, so there is a small amount of flex on the pedal deck when I over-enthusiastically stomp on the middle pedal. Additionally, the wheel displays some movement. The wheel’s movement is not down to its mounting points/components, but rather the actual frame/arm section which is braced between the upper and lower frames by a slightly outward kinked vertical connecting tube.
With the combined weight of the CSW v2 wheelbase and my arms hanging onto the wheel rim, some flexing of the steering arm section of the frame can occur whilst sim racing. In both cases, the movement was not enough to be distracting or cause any real issues for me.
Using the SHH 3D printed shifter, l needed to source a piece of metal to add to the standard shifter mount’s plate, which allowed me to mount the SHH shifter using its clamping mechanism. The RS6’s shifter mount was stable during use and is a good platform on which to mount the shifter too. An improvement here would be to add several threaded adjustment holes to the frame to allow for a more flexible fore and aft placement of the shifter relative to the seating position.
Pros
+ Comfortable GT style seating position.
+ Pricepoint.
+ Accepts all major manufacturer’s peripherals.
+ General build quality and finish.
+ Easy access and egress (left side).
+ Compact design / small footprint.
+ Short assembly time.
+ Reasonably adjustable.
+ Clear concise instructions.
+ Includes shifter mount.
+ Cool black and red color scheme with other colors available.
+ Matching triple screen monitor stand available.
Cons
– Some flexing of the seat and main controls during use.
– Non-standard peripherals require extra materials.
– Internal cable management could be improved.
– The seat may be a little snug.
– Limited shifter mount adjustability.
– Shifter plate could be larger.
Pricing
Arriving at the pointy end of this review, what does Trak Racer’s RS6 cost?
Listed here below is the price of the reviewed model, plus prices for other world regions. The stated prices were correct at the time of publication, December 2017. All prices were taken from the official Trak Racer website. For sales tax, duties and worldwide shipping costs where applicable, please consult the Trak Racer website.
Review model:
Price as tested € 599,00 Including VAT & free shipping within the EU
- UK £ 499,00 Including VAT & free shipping
- US $ 629.00 Including VAT & free shipping
- AU $ 799.00 plus shipping
Final Thoughts
The Trak Racer RS6 simulator is a compact entry-level cockpit with sufficient adjustability and comfort to suit almost any sim racer’s height and weight. The seat could be considered snug, at its widest, it is 40 cm or 15.7 inches. It might pay to check this against other seats you have tried.
Although there is some flex around the control mounts and seat when using a higher powered wheel or stiffer brake, it was of little consequence when driving and not really distracting, nor did it break the immersion factor in VR.
The standard control mounting points are configured for the major manufacturer’s wheels, pedals, and shifters. As with most off the shelf simulators, anything that is non-standard will require some type of fabrication or adjustments to enable your equipment to be securely mounted. The shifter mount could benefit from some extra threaded mounting holes in the lower frame sections and a larger mounting plate, for say a handbrake or larger shifter unit.
After having driven with the RS6 for a number of weeks now, I have not experienced any back pain or fatigue while using it. A testament to the ergonomics of the overall design. I really enjoy driving GT and sports cars, especially the old school H-patterned types that allow me to heel and toe. The simulator offers the adjustability to approach a GT style driving position.
Trak Racer’s RS6 cockpit is quite a simple design and quick to assemble. Only six major steps are required to go from unboxing to sim racing within an hour or two. The simulator’s design is definitely focussed on having you sim racing as quickly and efficiently as possible.
If you are just starting out in sim racing and are looking at the many options available, this Aussie designed entry-level simulator has some favorable points going for it. If adjustability, price, ease of access and required space is of importance to you, the entry-level RS6 has you covered, mate.
Official Webpage – www.trakracer.com |
 Bsimracing Sim Racing Resources and News for the racing enthousiast.

